
Enhance Wedding Photos with AI: A Practical Guide to 4K-Ready Memories
Wedding photos are supposed to feel timeless, but the reality of a wedding day is anything but controlled. You’re moving fast, lighting changes from ceremony to reception, and the best moments rarely wait for perfect focus. That’s why even beautiful wedding shots can end up a little dark, slightly soft, or noisy when you zoom in.
The good news: you don’t need to be a pro retoucher to polish your gallery. With the right workflow and a reliable ai image editor, you can make your favorites look cleaner, sharper, and more “print-worthy” in minutes. In this guide, I’ll walk through what wedding photo enhancement actually means, when AI makes sense, and how to use Img2Img AI’s 4K Image Converter to get results that hold up in albums, frames, and on big screens.
Why wedding photos often need enhancement (even if they were shot well)
Most wedding photos don’t need a makeover—they need a nudge. Common issues usually come from the environment, not the photographer:
- Low light at receptions forces higher ISO, which introduces grain and color noise in shadows.
- Mixed lighting (candles, LEDs, window light, spotlights) can make skin tones look uneven.
- Candid movement creates subtle blur that feels fine on a phone but obvious on a print.
- Background distractions pull attention away from the couple, especially in crowded venues.
- Close-ups reveal small things you didn’t notice on the day: tired eyes, shine, or patchy tones.
Enhancement is simply the process of correcting these small friction points so the photo matches how the moment felt: warm, clear, flattering, and focused on the people that matter.
What “enhancement” should do (and what it shouldn’t)
A good enhancement pass aims for “natural but better.” In practice, that means:
- Lift exposure without washing out highlights (keep the glow of lights and the texture of the dress).
- Reduce noise without plastic skin (skin should look like skin).
- Improve clarity without crunchy sharpening (hair and eyelashes get definition, but edges don’t look jagged).
- Balance color so skin tones feel alive (not orange, not gray).
- Increase resolution for output (so prints and crops don’t fall apart).
What enhancement shouldn’t do is change identities, over-smooth faces, or turn a soft romantic look into something harsh. If you’ve ever seen a photo where pores disappear and eyebrows look like stickers, that’s the opposite of what you want for wedding memories.
Why 4K matters for wedding photos
You can get away with “good enough” resolution on Instagram. You can’t hide it on a 12×16 print, an album cover, or a living-room TV. The moment you crop in or enlarge, small problems get magnified: blur becomes “soft focus,” noise becomes “dirty shadows,” and edges start to look pixelated.
That’s where a dedicated 4K Image Converter is useful. The goal isn’t just to enlarge; it’s to upscale in a way that keeps details believable—cleaner texture, clearer edges, and more stable fine detail—so the image is ready for real-world uses like printing, framing, and digital slideshows.
Img2Img AI: a wedding-friendly AI workflow (fast, consistent, natural)
Img2Img AI is designed to make quality improvements feel straightforward. Instead of spending ages tweaking sliders, you run your photo through a targeted enhancement step, evaluate the result, then optionally do small aesthetic tweaks afterward. It’s especially effective when you have a batch of “almost perfect” images and you want the whole set to look more consistent.
A simple workflow that works well for weddings:
- Choose the images that will be enlarged (album cover, framed portraits, hero moments).
- Use Img2Img AI’s 4K Image Converter to improve resolution and perceived clarity.
- Do a quick final check for naturalness (skin texture, halos around edges, overly bright highlights).
- Export and use the enhanced versions for print, display, and sharing.

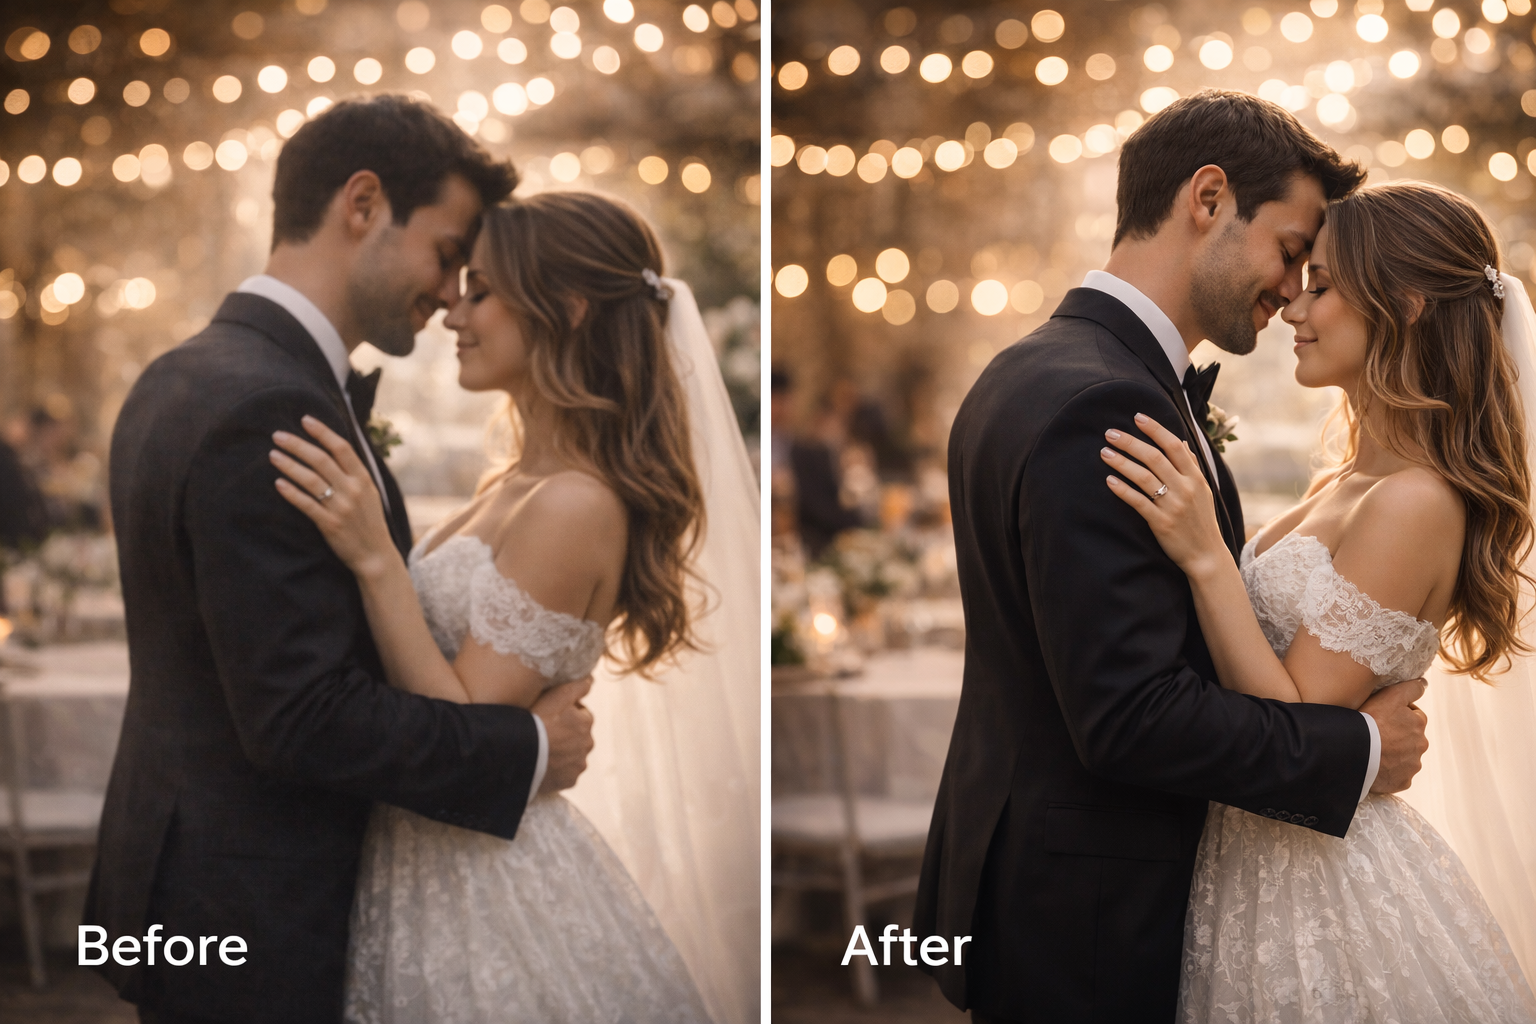
Case study: fixing a low-light reception candid without “over-editing”
Let’s take a classic scenario: the reception hug shot. It’s emotional, it’s real, and it’s usually shot under warm lights with movement in the frame.
The original problems
- Faces look slightly soft when you zoom in.
- Shadows are noisy, especially on dark suits and hair.
- Warm venue lighting makes skin tone uneven across the frame.
- When you crop tighter, details don’t hold up.
What a good AI enhancement should achieve
- Improve perceived sharpness in eyes, hair, and fabric without making skin look overly textured.
- Reduce noise while preserving natural gradients (cheeks, forehead highlights, dress folds).
- Keep the warm ambience so the photo still feels like a nighttime celebration.
- Output a larger, cleaner file that can survive printing and cropping.
Using Img2Img AI as an ai image editor, the 4K Image Converter step is where the image becomes “frame-worthy.” The difference isn’t just bigger pixels; it’s confidence that the photo won’t crumble when you enlarge it.
Img2Img AI vs other wedding photo editors: what to choose and when
There are many tools that can enhance wedding photos, but they don’t all aim for the same outcome. Here’s a practical comparison you can use when choosing a workflow.
| Tool type | Best for | Strengths | Trade-offs |
|---|---|---|---|
| Img2Img AI (4K Image Converter) | Print-ready upscaling and clean enhancement | Fast, consistent upgrades; great for batches; strong for enlargement | Not a full layer-based editor |
| Face-focused enhancers | Tight portraits and quick social sharing | Simple, noticeable results fast | Can look “processed” on skin; may distort details |
| General online photo editors | Basic adjustments, filters, cropping | Familiar controls; easy touch-ups | Upscaling and detail recovery may be limited |
| Pro desktop editors | Full creative control and precision retouching | Masks, layers, advanced color and skin control | Time-consuming; steep learning curve for big batches |
If you’re building an album or preparing prints, starting with a 4K-ready enhancement pass is often the smartest move: it raises the floor for the whole set, then you only spend manual effort on a few hero images.
Tips for natural-looking results (so it still feels like your day)
- Enhance a few “reference” photos first, then apply the same approach to the rest for consistency.
- Zoom to 100% and check faces; if skin looks waxy, dial back the intensity in your next pass.
- Watch for halos on edges (hair against bright lights is the usual giveaway).
- Don’t force reception photos to look like daytime; keep shadows and mood.
- Use enhancement to support your story, not replace it—candid imperfections are part of what makes wedding photos feel real.
FAQs: enhancing wedding photos with AI
Can AI fix blurry wedding photos?
AI can often improve slight softness and make details look clearer, especially when you’re enhancing for display and print. Extremely blurred photos may not become perfect, but many “almost sharp” images can become surprisingly usable.
Can I use enhanced photos for albums and prints?
Yes—this is exactly where a 4K workflow shines. When the output is cleaner and higher resolution, your photos will look better on paper and on large screens, and they’ll handle cropping far more gracefully.
Do I need editing skills to use an ai image editor?
Not really. The most important “skill” is knowing what looks natural: clean shadows, clear details, realistic skin texture, and a consistent look across the set.
Ready to upgrade your wedding photos to 4K?
If you want your favorites to look sharper, cleaner, and more print-ready—without turning editing into a second job—start with Img2Img AI’s 4K Image Converter and build from there.